


Expo, a framework that significantly improves the React Native developer experience, has become very popular in the last couple of years. Its “managed” workflow lets developers work entirely in React; the underlying native app, including the often messy process of updating React Native, is completely taken care of by the framework. Unfortunately, using the managed flow has traditionally required apps to stick to whatever set of native extensions are in the Expo Go client; if more native code is needed, developers have had to use Expo’s “bare” flow, which is missing many of the conveniences of the managed flow.
This is no longer the case. The Expo project has made great strides over the last couple of years towards letting developers get most of the benefits of Expo while still allowing them to use native modules. In this post, I’m going to show you how to integrate a native module into a “managed” Expo app using Expo plugins and EAS.
Expo
React Native (RN) allows developers to use popular web technologies and development tools to create cross-platform native apps. While typical React Native apps are mostly written using JavaScript and React, developers may still need to make modifications to native code, particularly when updating to new versions of RN. Developers must also have complete development toolchains for iOS and Android. Distributing new builds for testers or general users is handled much like any other native app — the developer creates new iOS and Android builds and distributes them via platform-specific app stores.
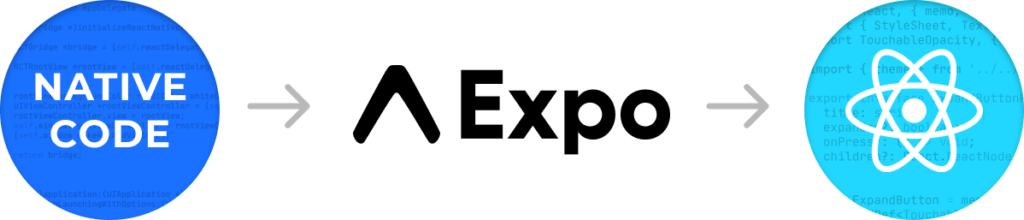
Expo simplifies the development of RN apps by allowing developers to focus almost exclusively on React code. Apps using Expo’s “managed” development flow use a standard native client that includes a number of popular extension packages. Developers can use those packages, and any purely JavaScript-based packages, without ever having to worry about native code. Testers can use the standalone Expo Go app to quickly try out new versions of an application during development without having to go through app stores or install custom profiles on devices. When it’s time to distribute an app, the web code is bundled up with platform-specific builds of the standard Expo client to create publishable packages.
Expo actually consists of 2 services: the Expo framework and Expo Application Services (EAS). The Expo framework is used to develop and test applications and is managed through the expo command line tool. For example, expo init is run to create a new project on a developer machine, and expo start is run to start a local development server
EAS is a cloud service used for building, distributing, and updating Expo applications; it is used through an eas command line tool. For example, to create an installable iOS build of an Expo app, a developer would typically run:
$ eas build --platform iosThe app will be built on Expo’s cloud servers and can be downloaded for manual publication through the app store. Builds can also be submitted to app stores through EAS, further simplifying the publishing process for developers.
Expo and native code
Expo loses some of its advantages when a project needs to use native code that’s not part of the standard client. To use custom native code, a project has traditionally needed to be “ejected” from Expo’s managed workflow into the “bare” workflow. A bare workflow project still uses Expo libraries and has many of the same capabilities as a managed app, but the developer has to deal with the complexities that come with a standard RN app (upgrade issues, ensuring dependency compatibility, creating native builds, etc.).
In 2021, Expo announced two features that allow custom native code to be used with Expo while still maintaining many of the advantages of Expo’s managed development flow: config plugins and custom development clients.
Config plugins
Although a managed Expo project looks like a typical web app, it is a native app, and does have native code. You can see the native code by running expo eject. This command will add all the native code necessary to build complete iOS and Android apps to the project. This is essentially what happens when running the eas build command for a managed Expo app. The project is uploaded to a cloud server that ejects it and builds standalone iOS and Android applications.
Config plugins provide developers with the ability to hook into the build process and make controlled modifications to the native code before it’s built. For example, an RN package may require that some library initialization code be added to MainApplication.java and AppDelegate.m. A config plugin can insert the necessary code into the default native files used by Expo after the project is ejected but before the native build tools run. A config plugin is a part of the project, either in a dependency or directly included in the project, and is run during the build process on EAS servers.
The upshot is that config plugins let a developer modify the native code in an app without having to eject. Because config plugins run at build time, they can work even if parts of the underlying app are updated — the managed Expo update process still works with config plugins.
Custom development client
By default, all Expo apps share the same native underpinnings, which is why the Expo Go client can be used during development for any Expo app. This makes development and testing easier since app updates can be distributed over-the-air without having to be published to an app store. Unfortunately, this flow doesn’t work if the app requires custom native code.
To support this development workflow, Expo now allows the creation of custom development clients. A custom development client is essentially an application-specific version of the Expo Go client. Like the standard client, it downloads the application JavaScript bundle from a dev server and provides some useful developer tools. However, the native code in a custom client can be extended or modified as needed to suit the application.
A custom development client will need to be built and distributed to testers just like any other native app. However, it will only need to be rebuilt when the native code changes, which will happen much less frequently than updates to the React application code during the development process.
Putting it all together
With these two tools, a developer can end up with most of the benefits of a managed Expo workflow while still making use of custom native code. The first step is to create a config plugin that can make any required changes to the native code. This will allow the app to be built and upgraded using the managed Expo flow. The second step is to build a custom development client that makes use of the updated native code. Once developers and testers have access to the custom client, app development can proceed just as it would for a typical managed flow Expo app.
Creating an Expo config plugin is something that technically only needs to be done once for a given library, assuming the plugin is added to the library or extracted to a standalone package. However, it’s also possible to include simple plugins directly in a project repository. Creating a reusable plugin is great for library authors, and for sharing amongst multiple projects that use the same native modules. However, a one-off plugin still has value, because it allows a project to use custom native code while continuing to take advantage of Expo’s managed workflow.
Example: Blueshift
To demonstrate how all of this works, we’re going to add support for the Blueshift analytics SDK to a managed Expo app. The overall process will be similar for any custom native module. Blueshift’s SDK is actually something of a worst-case scenario for Expo since it’s a standard native SDK (actually 2 platform-specific SDKs) rather than a React Native package. That means we’ll have to handle a few integration steps that wouldn’t be required when working with an RN package.
Application
The sample application we’ll be using is the “tabs” template application. You can generate a new instance of this with
expo init -t tabsOnce the app has been initialized, we’ll follow the setup instructions for the Blueshift iOS SDK to create our plugin. This post is focused on creating the Expo config plugin rather than setting up Blueshift, so I’m not going to cover how to set up an app in Blueshift’s dashboard or generate API keys.
Although a complete plugin would need to modify both Android and iOS project files, I’m going to focus on iOS in this post. The Android-related updates will be similar in scope and kind to what’s needed for iOS.
The plugin will make use of several helper functions and “mods” from the @expo/config-plugin package. Some of the API is described in Expo’s config plugins documentation. However, the package is still being developed, and there may be functions that aren’t yet described in the documentation. Exploring the library using your IDE’s language services can be very helpful.
Setup
An Expo config plugin is a JavaScript file that exports a single function. This file will be added to a plugins array in the app.json file, which is used by Expo’s prebuild command when building the native apps. Our plugin will include some support files, so we’ll add it to a plugins directory in the project folder, resulting in the following structure:
	TabApp/
	  app.json
	  plugins/
	    blueshift/
	      index.js    <-- the plugin file
	      ios/        <-- iOS support files
This isn’t a required structure. Plugins can go in arbitrary locations, even separate npm packages, but this structure works well for a project-local plugin.
The index.js file contains the plugin code. Although Expo supports TypeScript, Expo plugins must be JavaScript, so we can either write the plugin in JavaScript (which can still use types via jsdoc comments) or have a post-install build step.
At any point we can run
$ expo prebuild --cleanto verify that our plugin is making the changes we expect. This command does essentially the same thing as expo eject, adding native resources to the project directory. When developing a plugin, you will likely want to run expo prebuild multiple times. If your config plugin modifies project files (which our example plugin will), it could end up modifying the same file multiple times. The --clean option restores any modifications to the native files in the project directory, ensuring that the plugin will be working with a clean slate.
Native resources added by prebuild should not be checked into the repository. When developing a native plugin, you’ll want to commit the plugin and any associated resources (everything in the plugins/ directory in this example), but not any of the new or modified files resulting from running expo prebuild. Note that the snippets below are abbreviated and do not include error checking. For example, a complete implementation should validate that findIndex calls actually found something.
Updating the Podfile
One of the first tasks in setting up the iOS SDK is to actually add the SDK to the project. Blueshift supports both Cocoapods and Carthage for their iOS SDK. React Native uses Cocoapods, so we’ll follow that process, meaning the first step is to modify the project Podfile.To update the Podfile, we’ll add a withBlueshiftPod plugin function to index.js:
	const { withDangerousMod, withPlugins } = require('@expo/config-plugins');
	const { resolve } = require('path');
	const { readFileSync, writeFileSync } = require('fs');

	function withBlueshiftPod(config) {
	  return withDangerousMod(config, [
	    'ios',
	    (cfg) => {
	      const { platformProjectRoot } = cfg.modRequest;
	      const podfile = resolve(platformProjectRoot, 'Podfile');
	      const contents = readFileSync(podfile, 'utf-8');
	      const lines = contents.split('\n');
	      const index = lines.findIndex((line) =>
	        /\s+use_expo_modules!/.test(line)
	      );

	      writeFileSync(
	        podfile,
	        [
	          ...lines.slice(0, index),
	          `  pod 'Blueshift-iOS-SDK'`,
	          ...lines.slice(index),
	        ].join('\n')
	      );

	      return cfg;
 	    }
	  ]);
	}
	function withBlueshift(config) {
	  return withPlugins(config, [
		withBlueshiftPod,
	  ]);
	}

	module.exports = withBlueshift;
There’s a lot of “with” and “config” and nested callbacks here, but the basic architecture is fairly simple. Our plugin exports a single function that gets passed a config object, makes updates, and returns a config object. That’s the essence of a config plugin.
Expo config plugin function names generally start with “with”, although this is not a requirement. Plugins are passed the Expo config as their first argument, and may optionally be passed additional arguments. Plugin functions must return an Expo config that contains any configuration updates made by the function. This allows chains of plugins to collectively update the app config without overwriting each other.
The withPlugins function is part of the config plugin API and is used to chain plugin functions within a parent plugin. We’re going to have to make multiple updates to the native code, and doing that in several small plugin functions will be easier to manage than using one giant function.
One thing that may immediately jump out is the use of withDangerousMod. Why are we doing dangerous things?
Expo’s config plugin API provides a number of mods that can be used to update native files. These mods parse a given file type (Xcode project file, build.gradle, etc.) and provide APIs allowing for reasonably safe modification of the file’s content. Some file types, such as Podfiles, don’t yet have associated mods to work from, so plugin functions can use withDangerousMod when accessing those. This function takes two arguments — the name of the platform to which it applies (“ios” or “android”) and a plugin function.
The first thing our plugin function does is get a reference to the iOS project root from the config object, which it uses to read the Podfile. It then splits the content into lines and finds a specific anchor location where the new content (the pod 'BlueShift-iOS-SDK' line) will be inserted. The Podfile is then written back out to disk with the new content inserted, and the plugin function returns the unmodified config object.To tell Expo about this plugin, add a new “plugins” property to the app.json file:
	{
	  "expo": {
	    "name": "TabApp",
	    ...
	    "plugins": [
	      "./plugins/blueshift.index.js"
	    ]
	  }
	}
Before proceeding any further, you may want to commit the plugin (everything in the plugins/ directory) to the project repo. To test the plugin we’ll be using Expo’s prebuild command, which will add a bunch of native code to the repository that should not be committed to a project repo. Committing the plugin now will make cleanup a bit easier later.
You can test the plugin by running:
$ expo prebuild --cleanThis command is very similar to “eject” — it will create the ios and android native project directories, including all the necessary native source code and project files. Importantly for us, Expo will run our plugin, which should update the iOS Podfile. After the command completes, open ios/Podfile. Around line 11, you should see the line inserted by the plugin:
	target 'TabApp' do
	  pod 'BlueShift-iOS-SDK'
	  use_expo_modules!
	  config = use_native_modules!
Enable Remote Notification mode
Another part of the Blueshift integration is enabling Remote Notifications in background mode. To do this, we just need to set the value of the UIBackgroundModes key in the Info.plist file to ['remote-notification']. Expo provides a withInfoPlist mod for updating the Info.plist file; this function takes care of locating and reading the Info.plist file, allowing the plugin function to be quite a bit shorter than the last one:
	function withBlueshiftInfoPlist(config) {
	   return withInfoPlist(config, (cfg) => {
	    cfg.modResults.UIBackgroundModes = ['remote-notification'];
	    return cfg;
	  });
	}
The withInfoPlist mod loads and parses the project’s Info.plist file and adds the resulting object to the config argument as modResults. Within our plugin we can make modifications to the plist data, such as setting the UIBackgroundModes property. Expo will take care of actually updating the plist file using the config data returned by our plugin function.Once the new plugin function has been created, it needs to be added to the withPlugins chain:
	function withBlueshift(config) {
	  return withPlugins(config, [
		withBlueshiftPod,
	      withBlueshiftInfoPlist,
	  ]);
}Update the AppDelegate
The next step in the integration is to add some Blueshift initialization code to the app’s AppDelegate. Our plugin function will be very similar to the withBlueshiftPod plugin, in that it will update the raw text in a project file (AppDelegate.m). However, in this case we don’t need to use withDangerousMod since Expo provides a withAppDelegate mod to manage loading and updating the file.
	function withBlueshiftAppDelegate(config) {
	  return withAppDelegate(config, (cfg) => {
	    const { modResults } = cfg;
	    const { contents } = modResults;
	    const lines = contents.split('\n');

	    // Get Blueshift info from app config
	    const blueshift = cfg.extra.blueshift;

	    const importIndex = lines.findIndex((line) =>
	      /^#import "AppDelegate.h"/.test(line)
	    );
	    const didLaunchIndex = lines.findIndex((line) =>
	      /\[super application:application didFinishLaunching/.test(line)
	    );

	    modResults.contents = [
	      ...lines.slice(0, importIndex + 1),
	      '#import <BlueShift-iOS-SDK/BlueShift.h>',
	      ...lines.slice(importIndex + 1, didLaunchIndex + 1),
	      '  BlueShiftConfig *config = [BlueShiftConfig config];',
	      `  [config setApiKey:@"${blueshift.apiKey}"];`,
	      '  [config setDebug:YES];',
	      '  [config setApplicationLaunchOptions:launchOptions];',
	      '  [BlueShift initWithConfiguration:config];',
	      ...lines.slice(didLaunchIndex + 1),
	    ].join('\n');

	    return cfg;
	  });
	}
Note the use of cfg.extra.blueshift. Here we’re making use of the extra property in the Expo app.json file to store Blueshift configuration data. The updated app.json should look like (with a valid Blueshift API key):
	{
	  "expo": {
	    "name": "TabApp",
	    ...
	    "extra": {
	      "blueshift": {
	        "apiKey": "abc123abc123abc123abc123abc123"
	      }
	    }
	}
Finally, add the plugin function to the withPlugins chain:
	function withBlueshift(config) {
	  return withPlugins(config, [
		withBlueshiftPod,
	      withBlueshiftInfoPlist,
	      withBlueshiftAppDelegate,
	  ]);
	}
Add the React Native bridge
Another step in setting up the Blueshift iOS SDK is to add a React Native bridge module. This will allow the React code to call functions in the native Blueshift SDK to track events and change options.
The SDK documentation provides a Swift implementation for the bridge code and an Objective-C module to export the bridge API for React Native. Assuming those are used essentially as-is, the plugin will just need to copy them into the iOS project and add them to the Xcode project. It will also need to add the Blueshift library header to the Swift bridging header to make Blueshift calls, which are written in Objective-C, available in the bridge’s Swift code.
First, add copies of the bridge module and Objective-C wrapper to the plugin, resulting in this file structure:
	TabApp/
	  app.json
	  plugins/
	    blueshift/
	      index.js
	      ios/
	        Blueshift.m
	        BlueshiftBridge.swift
Then create a new plugin function that adds the Blueshift import to the Swift bridging header, copies the new files into place, and updates the Xcode project.
	const { IOSConfig, withXcodeProject } = require('@expo/config-plugins');
	const { getDesignatedSwiftBridgingHeaderReference } = IOSConfig.Swift;
	const { getAppDelegateFilePath } = IOSConfig.Paths;
	const { unquote } = IOSConfig.XcodeUtils;
	const { dirname } = require('path');

	function withBlueshiftReactBridge(config) {
	  return withXcodeProject(config, (cfg) => {
	    const xcodeProject = cfg.modResults;
	    const blueshift = cfg.extra.blueshift;

	    // Add the Blueshift import to the bridging header
	    const headerRef = unquote(
	      getDesignatedSwiftBridgingHeaderFileReference({
	        project: xcodeProject,
	      })
	    );
	    const { platformProjectRoot } = cfg.modRequest;
	    const header = resolve(platformProjectRoot, headerRef);
	    const contents = readFileSync(header, 'utf-8');
	    const lines = contents.split('\n');
	    writeFileSync(
	      header,
	      [
	        ...lines,
	        '#import <BlueShift-iOS-SDK/BlueShift.h>',
	      ].join('\n')
	    );

	    // Get the Xcode project "key" that the new file entries will be added
	    // to
	    const { projectName, projectRoot } = cfg.modRequest;
	    const group = xcodeProject.pbxGroupByName(projectName);
	    const key = xcodeProject.findPBXGroupKey({
	      name: group.name,
	      path: group.path,
	    });

	    // The directory where new source files should be copied to
	    const sourceDir = dirname(getAppDelegateFilePath(projectRoot));

	    // A helper function to copy files into the project
	    const addSourceFile = (name) => {
	      const src = resolve(__dirname, 'ios', name);
	      const dst = resolve(sourceDir, name);
	      writeFileSync(dst, readFileSync(src, 'utf-8'));
	      // Update the Xcode project data stored in the cfg object
	      xcodeProject.addSourceFile(`${projectName}/${name}`, null, key);
	    };

	    addSourceFile('BlueshiftBridge.swift');
	    addSourceFile('Blueshift.m');
	    return cfg;
	  });
	}
To update the bridging header, we use the withXcodeProject mod to load the Xcode project file and the getDesignatedSwiftBridgingHeaderFileReference helper function to get the path to the bridging header. Modifying the bridging header is technically more of a withDangerousMod type of operation since we’re loading and modifying the header file directly rather than working through Expo’s API. However, we need information from the Xcode project to reliably find the bridging header, so it’s reasonable to do this operation with withXcodeProject.
To add the RN bridge and Objective-C wrapper to the project, the plugin uses the Xcode project to find the project source code directory. It then copies the files into that directory and updates the Xcode project with entries for the two new files. The updated Xcode config is part of the cfg object, and is returned at the end of the plugin function.
After this last plugin function is added, the plugin chain should look like:
	function withBlueshift(config) {
	  return withPlugins(config, [
		withBlueshiftPod,
	      withBlueshiftInfoPlist,
	      withBlueshiftAppDelegate,
		withBlueshiftReactBridge,
	  ]);
}Building a custom client
At this point, the app running expo prebuild --clean should result in a compilable iOS app with Blueshift support. However, we need to make one more modification before we can build and test the app locally: add the expo-dev-client package.
$ expo install expo-dev-clientAfter installing this package, commit the updates to the package.json and yarn.lock files to version control.
At this point, the only project updates that should have been committed are the plugin source, the additions to app.json, and the updates to package.json and yarn.lock files resulting from installing expo-dev-client. Any other updates resulting from running expo prebuild should not be committed.
Note the use of expo install rather than yarn install. You should use expo to add packages to an Expo project rather than yarn or npm. This command behaves similarly to yarn or npm, but it verifies that package versions are compatible with the version of Expo being used (at least for packages that it has compatibility information for).
If you have a Blueshift account, add the API key to app.json, and set Blueshift’s debug config flag to true in AppDelegate.m if it’s not already — this will tell Blueshift to output debug messages to the console. Open the app in Xcode and then try building it and running it in a simulator. If everything is configured properly, the app should build and startup, and you should see Blueshift initialization messages in the console.
The easiest way to create a redistributable development client is using the EAS command line application:
$ eas build --platform iosThis will upload a snapshot of the project repository to the EAS cloud service and create a build. EAS can manage application signing and create a distribution profile for testers, allowing them to install the client directly from Expo servers. Once developers and testers have installed a custom client, further application updates can be delivered over-the-air by publishing to the appropriate release channel using expo publish.
Conclusion
The ability to support custom native code using Expo’s managed build process is a huge step forward for the Expo framework, resolving one of its biggest shortcomings. In this post I’ve shown you how to take advantage of this capability using a standard native SDK. Integrating packages that already support React Native is typically even easier since these packages require less manual modification of a project. Some RN packages, such as react-native-firebase, already include support for custom Expo clients out of the box! Expo can greatly reduce development and maintenance costs, and supporting custom native code will allow it to support a whole new class of applications.