


React Native is great for writing mobile applications. It lets you use web paradigms for UI construction, which are usually much simpler than the native analogues. Tools like Expo make developing apps even easier, allowing developers to mostly ignore the native side of things. Unfortunately Expo, and most other React Native resources, only deal with creating standard, self-contained apps. (Expo currently has pre-release support for including custom native code in projects.) What if your app wants to provide some system-wide functionality, like an iMessage extension on iOS or an input method service on Android? Can you even use React Native in those cases?
The good news is that yes, it’s possible to use React Native for extensions! In this post we’re going to focus on custom input methods (“keyboards”), showing you how, with the proper native setup, you can write a single React Native component that will work as both an iMessage extension and an Android input method service. The bad news is that some native code and native project configuration changes will be needed. However, once the project is properly set up you’ll be back to spending most of your time in a single React codebase rather than multiple native codebases.
Example app
Many apps may find it useful to provide a custom input method. For example, iMessage extensions are provided by apps like YouTube (share videos), ESPN (share sports scores), Google Maps (share map locations), United (share flight info), and even 1Password (stickers).
The example app used for this post is a mock informational app that also provides some stickers for messaging. The application has two parts — the main “container” app and a sticker keyboard. The keyboard is implemented as an iMessage extension on iOS and an input method service on Android.
The project repository contains several commits that show the state of the app at various points during the implementation process. This post frequently refers to the sample code, so having that available will make it easier to follow along.
How custom input methods work
Both iOS and Android support custom input methods, although they work in very different ways. On iOS, custom input methods are implemented using extensions, either keyboard extensions or iMessage extensions. An extension runs as a separate process from the container app, sandboxed for security and with no direct access to the container app (i.e., no shared memory and no access to container app files). Extensions also have some API restrictions that normal apps do not, and their resource access is more limited. True keyboard extensions in particular are very constrained; while exact limits differ by device and OS version, keyboard extensions generally only have 30-45MB of memory to work with, making them ill suited to React Native. iMessage extensions, on the other hand, have a much higher memory ceiling, so we’ll be focusing on those in this article. As iMessage extensions they aren’t as universal as true keyboard extensions, but they can provide similar functionality (and more) within Apple Messages.
Android custom input methods are implemented as input method services. Unlike iOS extensions, input method services are part of the container app rather than running in a separate process. If the service is accessed while the container app is running, the service will be a part of the app process. If the service is accessed when the container app is stopped, a new app process will be started. Since input method services run as part of their container apps, they don’t have the same API and memory limitations as their iOS counterparts, and they have direct access to container app resources.
Adding an iMessage extension
Adding a React Native iMessage extension to an app involves both the native code and React. The iOS extension itself must be added to the native project, and then the extension content is created using React.
Native code
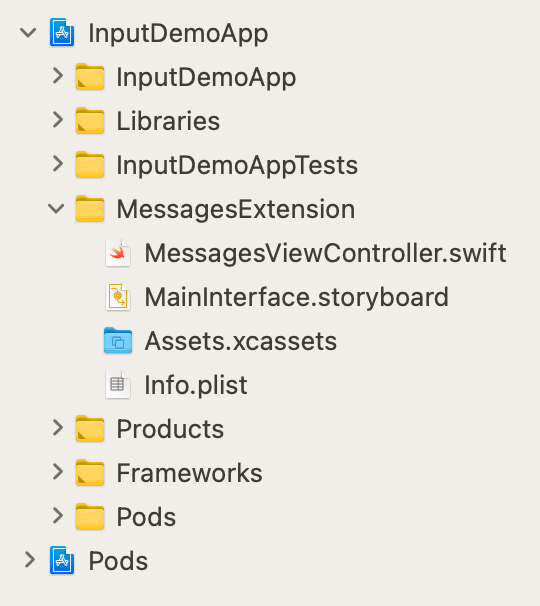
To add an iMessage extension to an app, open the app in Xcode, select the app’s project, and add a new iMessage Extension target. In the example app, the target is named “MessagesExtension”. A new iMessage extension target initially contains a single module, MessagesViewController.
Since the extension content will be written in React, the MessagesViewController module needs to be able to load and display a React Native view. That requires a few project modifications in addition to the view-loading code.
The Cocoapods configuration file in ios/Podfile needs a target for MessageExtension so that MessageExtension will be able to use the native parts of React Native. The new target is similar to the existing InputDemoApp target, but it only needs the config and use_react_native directives.
The new extension uses Swift, which is the preferred language for new iOS code. However, the React Native APIs are all in Objective-C. For the extension to be able to use the React Native APIS, an Objective-C bridging header (Bridging-Header.h) must be added to the project. The header should import at least React/RCTRootView.h and React/RCTBridgeModule.h. It also needs to be specified as the Objective-C Bridging Header in MessagesExtension’s build settings.

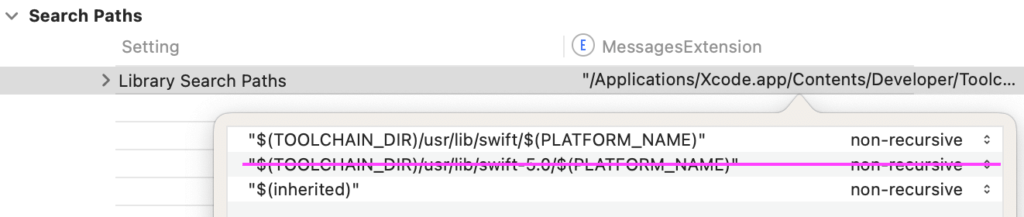
Another build setting that likely needs to be changed is Library Search Paths. By default, at least for projects created with Xcode 12.5, this setting references the swift-5.0 headers. Building with these headers will result in an undefined symbol error, so they should be removed from the search path.
Assuming you’re using the latest version of Xcode (12.5 as of this post) and React Native 0.64, you’ll need to patch react-native to use it in extensions. React Native 0.64 uses some APIs that are not available in extensions, and while Xcode < 12.5 would allow extensions to build with restricted APIs, Xcode 12.5 does not. Two files in the react-native npm package need some precompiler directives added to skip code that doesn’t work in extensions. The patch-package npm package is useful here; it will allow any changes made to the react-native package to be saved as a patch and committed to your project repository, as was done for the sample app.
With the project updated to use React Native, MessagesViewController should be modified to implement RCTBridgeDelegate. The only required method for this protocol is:
func sourceURL(for bridge: RCTBridge!) -> URL! {
  RCTBundleURLProvider.sharedSettings()?
    .jsBundleURL(forBundleRoot: "index.stickers", fallbackResource: nil)
}
Note that the source URL uses a bundle named “index.stickers”. Using this value tells React Native to load the JavaScript bundle in index.stickers.js, which is a new React entry point. The original app entry point, index.js, contains all the React code for the container app. Using a separate entry point allows the extension to load only the code it needs rather than the entire app, which is useful in the extension’s more resource-constrained environment.
MessagesViewController will also need code to load a React Native view. All of that can go in the willBecomeActive method, which (as its name suggests) is called when the extension becomes active. The new code doesn’t need to do much — it will just create an RCTRootView to render the app and a UIViewController to manage it, and add the controller as a child of MessagesViewController. Since the UI will be managed by React Native, the project doesn’t need a storyboard, so MainInterface.storyboard can be removed.
The project’s Info.plist will need a couple of modifications, too. The NSExtension dictionary should be updated to load MessagesViewController as the main class rather than loading MainInterface.storyboard. In addition, a new App Transport Security Settings dictionary is needed to provide an HTTP exception for localhost. This allows the extension to load React code from the React development server during development.

Along with rendering the extension’s React view, the native code needs to provide some means for the React code to send a sticker to Apple Messages. For that, the app needs a native module. This module (MessagesModule in the sample app) has direct access to the active MessageExtension object and exposes an insertSticker function that can be called from the React code. This function accepts an image URI, creates an MSSticker object from it, and inserts the sticker into the active conversation in the Messages app.
MessagesModule is written in two parts, a Swift file containing the module implementation, and an Objective-C file that makes the module available to React Native since the RN macros required to export native functions only work in Objective-C.
// MessagesModule.swift
@objc(MessagesModule)
class MessagesModule: NSObject {
  ...
  /**
   Insert a sticker into the active conversation.
   */
  @objc func insertSticker(
    _ stickerUrl: String,
    resolver resolve: @escaping RCTPromiseResolveBlock,
    rejector reject: @escaping RCTPromiseRejectBlock
  ) {
    ...
  }
}

// MessagesModule.m
@interface RCT_EXTERN_MODULE (MessagesModule, NSObject)
RCT_EXTERN_METHOD(insertSticker
                  : (NSString *)stickerUrl resolver
                  : (RCTPromiseResolveBlock)resolve rejector
                  : (RCTPromiseRejectBlock)reject)
@end
With the native code in place, the next step is to write the React part of the extension.
React code
On the React side, the app needs a component to render the input’s UI (src/Stickers.tsx) and an entry point to load it (the index.sticker.js bundle mentioned earlier).
// index.sticker.js
import {AppRegistry} from 'react-native';
import App from './src/Stickers';
AppRegistry.registerComponent('InputDemoStickersApp', () => App);
The new entry point looks very similar to the default entry point file created by react-native init. The only difference is that we’re loading and registering the Stickers component rather than the main App component. As mentioned previously, the main reason to do this is memory and space efficiency. App extensions run as separate processes, so there’s benefit to not loading more code than necessary. Extensions are also more limited than normal apps, and the main application may need libraries that can’t be included in an extension bundle.
The Stickers component in the demo app is very simple — it just renders a list of Image components in a FlatList. This style of app is very common for messaging extensions, which often simply provide a list of stickers for the user to select from. An extension UI doesn’t have to be simple, though. The main restrictions are the lower-than-normal memory ceiling (using too much memory will make the extension crash) and some restricted APIs. As long as the component stays within those boundaries, it has a lot of UI flexibility.
Each Image displayed by the app is wrapped in a Pressable. When pressed, the Pressable calls a sendSticker method that determines the sticker’s image URI and passes that to the native insertSticker function exported by MessagesModule.
import { NativeModules } from 'react-native';
const { MessagesModule } = NativeModules;
...
const sendSticker = useCallback(async (sticker: Sticker) => {
 const {uri} = Image.resolveAssetSource(sticker.source);
 try {
   await MessagesModule.insertSticker(uri);
 } catch (error) {
   console.error(error);
 }
}, []);

const renderSticker = useCallback(
 (info: ListRenderItemInfo<Sticker>) => {
   return (
     <Pressable onPress={() => sendSticker(info.item)}>
       <Image source={info.item.source} style={styles.image} />
     </Pressable>
   );
 },
 [sendSticker],
);
Trying it out
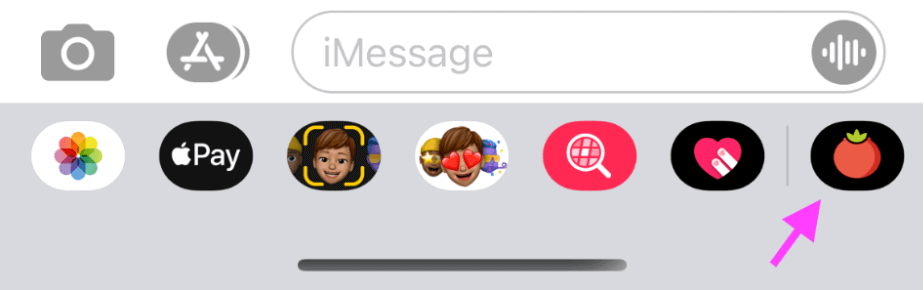
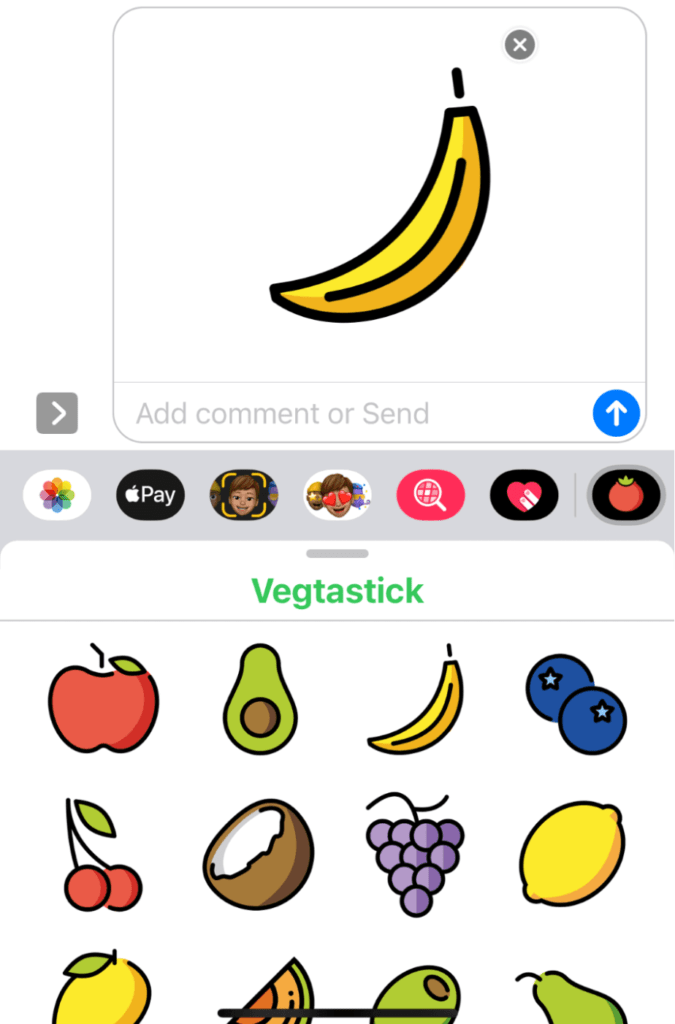
To try out the iOS extension, start the InputDemoApp target in Xcode or run yarn ios from the command line. The app will build for a couple of minutes, a simulator will open, and the container app will start. Once it’s running, close the container app and open Messages in the simulator. The app strip should contain a new entry — this is the Messages extension!
Tap it and the input area will open under the text input field. The extension may initially take a few seconds to load. In a release build it will be significantly faster, and can be made faster still by enabling the Hermes JS engine for the extension in the project’s Podfile.
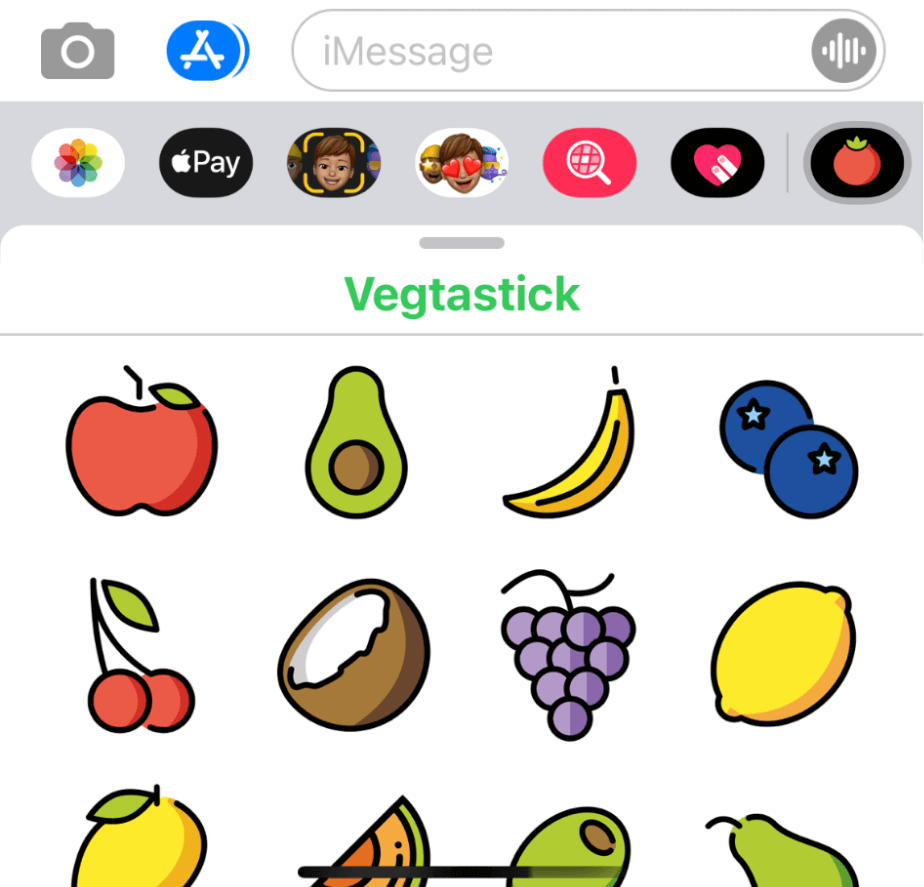
Once the extension is loaded, tapping a sticker will insert it into the message input field.
Adding an Android input method
Native code
Now for the fun part — making the same bit of React code work in Android! The React code itself won’t need any changes (that’s the whole point of this exercise); all the new work will happen in the Android part of the project. As with iOS, the Android native code just needs a module that can load a React view into the app’s input area and a native module that the React code can call to insert a sticker into the active app. Because Android input methods are part of the main app process, adding one to an app is less involved than adding an extension to an iOS app.
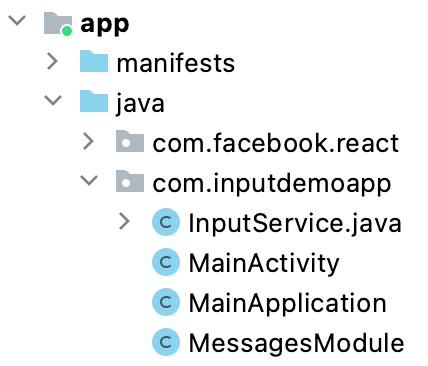
The Android code organization roughly parallels the iOS side, with Android having an InputService class that is analogous to MessagesViewController in iOS, and a MessagesModule class that does the same job as the iOS MessagesModule class.
One item of note in the InputService class is how the React instance is started. In most Android React Native examples, the React instance is initialized in the RESUMED lifecycle state. This is usually fine, but if the input service is started while the app isn’t running, React will fail to initialize. Using an initial state of BEFORE_CREATE will ensure the React instance is available when the input service starts up.
// InputService.java
return ReactInstanceManager
   .builder()
   .setApplication(getApplication())
   .addPackages(packages)
   .setUseDeveloperSupport(BuildConfig.DEBUG)
   .setInitialLifecycleState(LifecycleState.BEFORE_CREATE)
   .setJSMainModulePath("index")
   .setBundleAssetName("index.android.bundle")
   .build();
A minor difference from the iOS implementation is that the Android code uses the same index.js entry point (.setJSMainModulePath("index")) as the main app. There are a couple of reasons for this. One is that there’s no need to use a second entry point since the input service runs as part of the main app. The other is that the Android RN build process can’t easily handle multiple bundles, so using a second entry point isn’t really feasible in any case.
For the InputService class to actually work as an input service, a new <service> block must be added to the main AndroidManifest.xml file. This block describes the service and tells Android what class should be used when invoking it (i.e., InputMethod).
<service
 android:name=".InputService"
 android:label="@string/app_name"
 android:permission="android.permission.BIND_INPUT_METHOD"
 android:exported="true">
 <intent-filter>
     <action android:name="android.view.InputMethod" />
 </intent-filter>
 <meta-data
   android:name="android.view.im"
   android:resource="@xml/method" />
</service>
Another addition to the original AndroidManifest.xml file is a <provider> block. This block sets up a file provider that the native code uses to access sticker files stored on the device.
<provider
 android:name="androidx.core.content.FileProvider"
 android:authorities="com.inputdemoapp.fileprovider"
 android:exported="false"
 android:grantUriPermissions="true">
 <meta-data
   android:name="android.support.FILE_PROVIDER_PATHS"
   android:resource="@xml/file_paths" />
</provider>
Trying it out
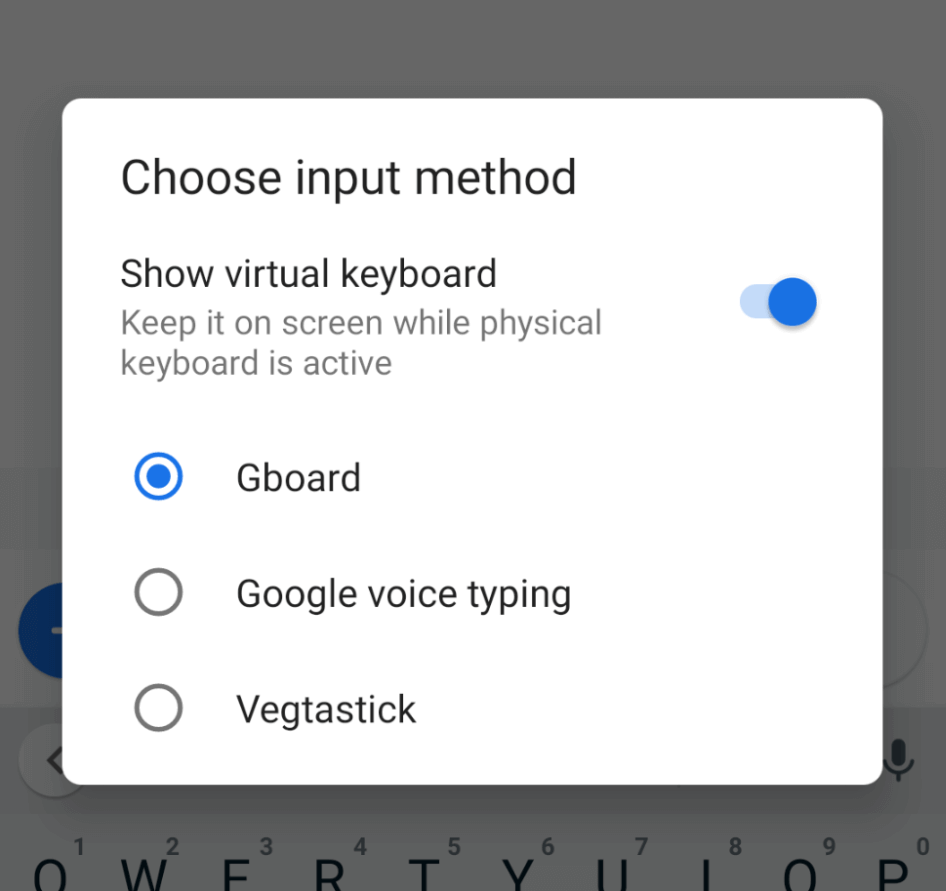
To start the Android app, use Android Studio, or run yarn android from the command line. One key difference is that the input service needs to be explicitly enabled on Android. After the app is installed, you’ll need to open up your device’s keyboard settings and enable the InputDemoStickersApp input method. On a stock Android system, open System -> Languages & input -> Virtual keyboard -> Manage keyboards and enable InputDemoStickersApp.
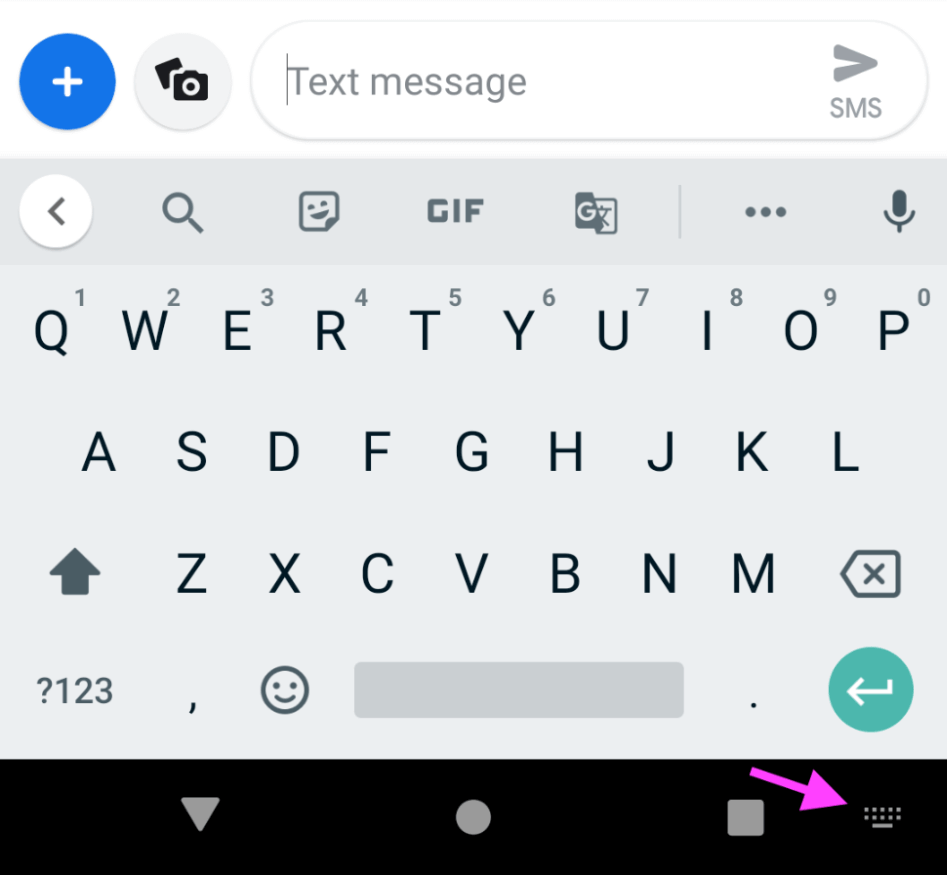
Once the keyboard has been enabled, open a messaging app and tap in the input field to bring up the default keyboard. Then tap the “keyboard” button in the lower right of the screen and choose InputDemoStickersApp.
With the sticker keyboard enabled, the sticker grid should appear just like it did on iOS. As with iOS, tapping a sticker should insert it into the message input field.
Summary
There you have it! With the necessary code in place in both native apps, a single React Native component can work as a cross-platform custom keyboard, bringing the single-codebase-for-multiple-platforms promise to custom inputs as well as full applications.